Easy Sushi Grade Salmon Maki
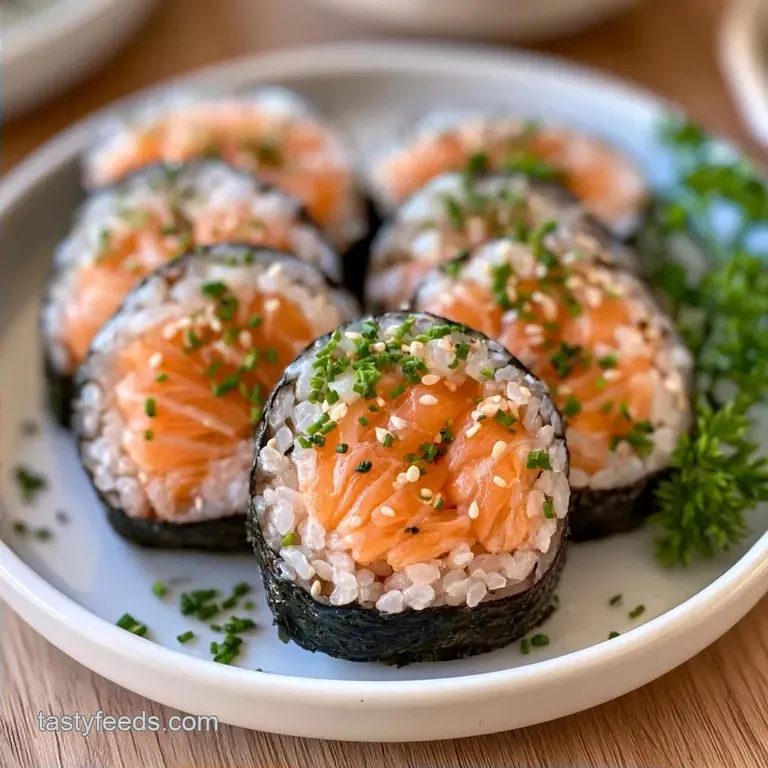
- Time: 30 min active + 15 min cooking
- Flavor/Texture Hook: Fresh, buttery salmon with tacky, vinegared rice
- Perfect for: A fancy feeling dinner that doesn't take all day
The smell of rice vinegar hitting hot rice is the best part of this whole process. It's that sharp, tangy aroma that tells you the meal is actually happening. I used to think I needed a degree in Japanese cuisine to get this right, but it's mostly about the prep flow.
You don't need fancy gear or a million ingredients. Once you have the rice tacky and the salmon sliced into clean strips, the rest is just a bit of hand eye coordination. You'll get a result that looks like it came from a high end spot, but you're just in your pajamas.
This Sushi Grade Salmon Maki is all about the balance of fresh fish and seasoned grain. It's a quick win for anyone who wants a fresh, light meal that feels like an event. Let's get into it.
Sushi Grade Salmon Maki
The Texture Trick
The biggest hurdle is the rice. If it's too mushy, the roll collapses. If it's too dry, it falls apart the second you slice it. You want it glossy and slightly sticky so it holds the salmon and cucumber in a tight grip.
Fanning the Rice: Moving air cools the rice quickly, which lets the vinegar soak in without making the grains mushy. This creates that shine you see in restaurants.
Pressure Control: You need firm pressure with the mat, but if you squeeze too hard, you'll crush the rice and lose the airy texture.
Decision Shortcut: If you want a tighter roll, use a bamboo mat with plastic wrap. If the rice is sticking to your hands, dip your fingers in vinegared water. If the salmon is too soft to slice, pop it in the freezer for 10 mins first.
Right then, let's look at how this stacks up against the traditional way.
| Feature | Quick Home Method | Traditional Edomae |
|---|---|---|
| Rice Prep | Pot or Rice Cooker | Traditional Hagama |
| Salmon Cut | Uniform Sticks | Specific Angle Slices |
| Cooling | Hand Fan / Cardboard | Large Wooden Tub (Hangiri) |
| Speed | 45 minutes | Several hours |
The Texture Trick
Wait, I already covered the basics above, so let's look at the specifics of why this works.
The Starch to Vinegar Balance: The sugar and salt in the vinegar mixture break down the surface tension of the rice. This makes it tacky rather than just sticky, which is why the roll stays together.
Temperature Contrast: The room temperature rice against the cold, fresh salmon creates a sensory pop. If the rice is too hot, it will partially cook the raw fish and ruin the texture.
The Ingredient Roles
| Ingredient | What It Does | Best Swap |
|---|---|---|
| Sushi Rice | Provides the structural base | Short grain Calrose rice |
| Rice Vinegar | Adds tang and preserves the rice | Apple cider vinegar + pinch of sugar |
| Sushi grade Salmon | Main protein and healthy fats | Sashimi grade tuna |
| Nori | Holds the roll together | Soy based seaweed sheets |
Recipe Details
- 2 cups (400g) Short grain Japanese sushi rice Why this? High starch content for stickiness
- 2 ¼ cups (530ml) Water
- ¼ cup (60ml) Rice vinegar Why this? Essential for the classic tang
- 2 tbsp (25g) Sugar
- 1 tsp (6g) Salt
- 8 oz (225g) Sushi grade salmon fillet Why this? Safe for raw consumption
- 4 sheets (approx. 20g) Nori
- 1 medium (100g) Cucumber Why this? Adds a necessary crunch
- 2 stalks (30g) Green onions
- 2 tbsp (30ml) Toasted sesame seeds
Required Gear
- Bamboo rolling mat (Makisu)
- Plastic wrap
- Very sharp chef's knife
- Small mixing bowl
- Medium pot with a tight lid
The Assembly Process
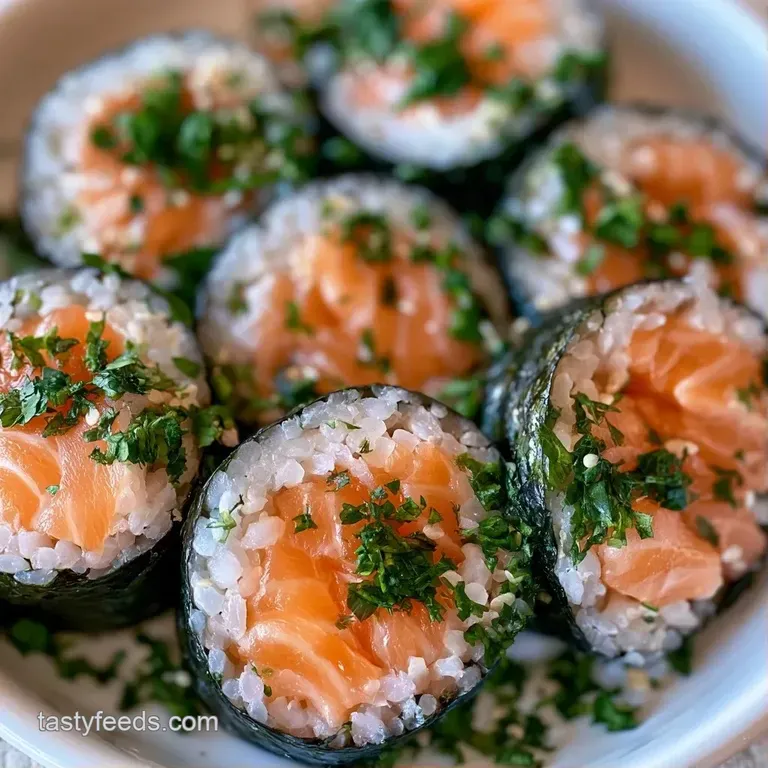
Phase 1: Preparing the Foundation
- Rinse the sushi rice under cold water until the water runs clear. Note: This removes excess starch and prevents the rice from becoming a gluey mass.
- Combine rice and water in a pot; bring to a boil, then simmer on low for 15 minutes. Wait until the water is fully absorbed.
- Remove from heat and let the rice steam, covered, for 10 minutes.
- While the rice is hot, gently fold in the rice vinegar, sugar, and salt using a slicing motion with a spatula.
- Fan the rice with a piece of cardboard or a hand fan while mixing to cool it to room temperature quickly for a glossy finish.
Phase 2: Prepping the Fillings
- Using a sharp knife, cut the sushi grade salmon into uniform sticks approximately ½ inch thick and 4 inches long.
- Slice the cucumber into thin matchstick sized strips, ensuring the watery center seeds are removed. Note: Removing seeds prevents the roll from getting soggy.
Phase 3: The Rolling Process
- Place a nori sheet on a bamboo rolling mat (Makisu) covered with plastic wrap.
- Spread a layer of seasoned rice evenly across the nori. Leave a 1 inch gap at the top edge.
- Arrange salmon strips, cucumber, and sliced green onions in the center of the rice.
- Roll the maki using the mat, applying firm, consistent pressure to create a structural bond without squeezing.
- Slice the roll into pieces with a sharp chef's knife and garnish with toasted sesame seeds.
Chef's Note: To get those clean, restaurant style slices, wipe your knife with a damp cloth between every single cut. This stops the rice from sticking and tearing the nori.
Maki Troubleshooting
If your roll isn't looking right, it usually comes down to one of three things: moisture, pressure, or the knife.
Rice Sticking to Your Hands
This happens when you try to spread the rice while it's still too warm or if your hands are dry. Keep a bowl of water with a splash of vinegar nearby and dip your fingers frequently.
The Roll is "Squashed" or Flat
You're likely pressing too hard during the rolling phase. The goal is to guide the rice into a cylinder, not compress it into a brick.
Nori Becomes Chewy or Rubbery
This is usually caused by the rice being too hot when spread. The steam penetrates the nori and makes it soft before you even eat it.
| Problem | Root Cause | Solution |
|---|---|---|
| Rice falling off nori | Not enough pressure | Firm up your roll with the mat |
| Salmon sliding out | Pieces too large | Cut salmon to exactly 1/2 inch |
| Torn nori sheets | Dull knife or over stuffing | Use a sharper blade and less filling |
Adjusting Portion Sizes
If you're making this for a crowd or just for yourself, the ratios stay mostly the same, but the technique shifts.
Scaling Down (2 rolls): Use 1 cup of rice and 1 ⅛ cups of water. Reduce the simmering time by about 2 minutes and keep a close eye on the water level.
Scaling Up (12 rolls): Double the ingredients, but don't double the salt and sugar exactly. Use about 1.5x the seasonings first, then taste. Work in batches of 4 rolls so the rice doesn't dry out while you're rolling.
Baking Note: If you decide to make a "baked" version of this Sushi Grade Salmon Maki, lower your oven to 350°F (180°C) and bake for 8-10 minutes. This keeps the fish tender.
Common Sushi Myths
Some people think you need a specialized "sushi rice" brand to make this work. That's not true. Any short grain rice with a high starch content, like Calrose, works just fine as long as you rinse it properly.
Another myth is that you have to "cure" the salmon at home to make it safe. While some do it for flavor, the safety comes from buying fish that is certified as sushi grade, meaning it was flash frozen to kill parasites.
Flavor Tweaks
If you want to move away from the basic version, try these variations. For a creamier profile, you can make a Philadelphia Sushi Roll by adding a slice of cream cheese next to the salmon.
The Spicy Salmon Twist
Mix a teaspoon of sriracha and a drop of sesame oil into the salmon strips before rolling. It adds a kick that cuts through the fat of the fish.
The Creamy Avocado Duo
Add a thin slice of ripe avocado. The buttery texture of the avocado pairs with the salmon to create a rich, filling roll.
Low Carb Option
Swap the rice for cauliflower rice. You'll need to sauté it first and let it cool completely. Note that it won't be as sticky, so you'll need to rely more on the nori for structure.
Storage and Waste
Fresh Sushi Grade Salmon Maki is best eaten immediately. If you must store it, wrap the rolls tightly in plastic wrap and keep them in the fridge for no more than 24 hours. The nori will eventually get soft, but it's still safe to eat.
Avoid freezing raw sushi rolls. The texture of the rice changes completely once thawed, becoming grainy and hard. If you have leftover fish, you can turn it into a poke bowl or check out my Smoked Salmon Sushi if you're switching to cured options.
For zero waste, use the cucumber ends and green onion tops to make a quick pickled side salad. Just soak them in a bit of the leftover rice vinegar and sugar.
Serving Suggestions
Serve your rolls with a side of pickled ginger and a small bowl of high-quality soy sauce. To add a bit of heat, a dab of wasabi on the side is standard.
If you want a full meal, pair the maki with a simple miso soup or a seaweed salad. The saltiness of the soup balances the sweetness of the seasoned rice. Trust me, a side of edamame with sea salt makes the whole spread feel like a real feast.
Recipe FAQs
Is it hard to make homemade sushi?
No, it is quite approachable. The main challenge is preparing the rice, but following a consistent rinse and-simmer process makes it manageable for beginners.
What is the easiest way to make sushi?
Use a bamboo rolling mat covered in plastic wrap. This prevents the seasoned rice from sticking to the mat and allows you to apply firm, consistent pressure.
How to make homemade sushi without raw fish?
Substitute the raw salmon with fully cooked fillets. Ensure the cooked fish is chilled and cut into uniform sticks approximately ½ inch thick.
What cooked fish can I use to make sushi at home?
Use firm fleshed options like baked salmon or steamed shrimp. If you enjoy using cooked seafood, you might also like the flavor profile of a spicy crab roll.
How to make sushi with no rice?
Wrap the fillings directly in the nori sheet. Increase the amount of cucumber and green onions to provide the necessary structure and bulk.
What are some good vegetarian fillings for sushi?
Stick with cucumber and green onions. These ingredients provide a crisp, fresh contrast to the salty nori and seasoned rice.
Is it true that raw sushi rolls can be frozen for later?
No, this is a common misconception. Freezing causes the rice to become grainy and hard once thawed, ruining the texture of the roll.
Sushi Grade Salmon Maki in 45 Minutes