Cream Cheese Sushi Roll in 45 Minutes
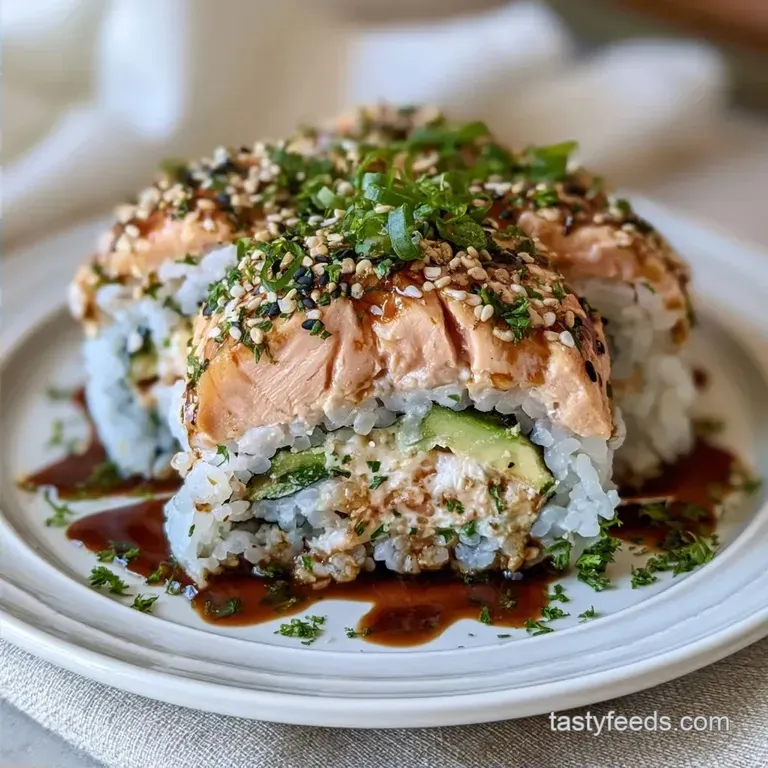
- Time: 25 min active + 20 min cook
- Flavor/Texture Hook: Rich, creamy center with a salty punch
- Perfect for: Quick weeknight dinners or a low effort party platter
The smell of seasoned rice vinegar hitting hot rice is where it all starts. I remember the first time I tried to make these at home. I didn't have a fancy mat, so I used a clean kitchen towel and some plastic wrap. It felt a bit chaotic, but the result was actually better than the takeout I'd been paying too much for.
You don't need a professional kitchen or an expensive course to get this right. The goal here is a fast win. We're using simple ingredients that you can find at any local grocery store.
This Cream Cheese Sushi Roll is all about balance. The coolness of the avocado and the richness of the cheese make the smoked salmon pop. It's a straightforward process that doesn't require hours of prep.
How to Make Cream Cheese Sushi Roll
The trick here is getting the rice temperature and texture exactly right before you start rolling. If the rice is too hot, it wilts the nori. If it's too cold, it won't stick to the sheet.
- Room Temp Rice
- Using rice at room temperature keeps the nori crisp and makes it easier to spread.
- The Plastic Wrap
- Wrapping your bamboo mat stops the rice from glueing itself to the wood, which saves you from a sticky mess.
- Thin Layers
- A thin layer of rice allows the filling flavors to shine and prevents the roll from becoming a giant log.
| Method | Time | Texture | Best For |
|---|---|---|---|
| Fast (This) | 45 mins | Tacky & Fresh | Weeknight Dinner |
| Classic | 2+ hours | Firm & Set | Formal Events |
What Each Ingredient Does
I've found that skipping the rinse on the rice is the fastest way to ruin a roll. According to USDA FoodData, the starch profile of short grain rice is what provides that necessary stickiness.
| Ingredient | What It Does | Best Swap |
|---|---|---|
| Sushi Rice | Provides the structure and "glue" | Short grain white rice |
| Rice Vinegar | Adds tang and prevents spoilage | Apple cider vinegar + pinch of sugar |
| Cream Cheese | Adds a silky, rich mouthfeel | Goat cheese or Ricotta |
| Smoked Salmon | Primary salt and protein source | Imitation crab or Cucumber |
The Essential Ingredients List
For a proper Cream Cheese Sushi Roll, stick to full fat ingredients. low-fat cream cheese doesn't hold its shape and often leaks out during slicing.
For the Sushi Rice 2 cups (400g) short grain sushi rice Why this? Necessary for the sticky texture 2 ½ cups (600ml) water 3 tbsp (45ml) rice vinegar 1 tbsp (12g) granulated sugar 1 tsp (6g) salt
For the Filling 4 oz (115g) full fat cream cheese Why this? Provides stability and richness 4 oz (115g) smoked salmon 1 large (150g) avocado 4 sheets (approx. 20g each) roasted nori 2 tbsp (30g) toasted sesame seeds
For Serving ¼ cup (60ml) soy sauce 1 tbsp (15g) pickled ginger 1 tsp (5g) wasabi paste
Your step-by-step Guide
Right then, let's get to the assembly. Keep a bowl of water nearby to dip your fingers in. If you don't, the rice will stick to your hands and create clumps.
Phase 1: Preparing the Base 1. Wash the rice in a fine mesh strainer until the water runs clear to remove excess starch. 2. Cook rice according to package instructions. While still hot, fold in the rice vinegar, sugar, and salt using a slicing motion with the paddle.
Note: Don't mash the grains, just slice through them 3. Spread the rice on a flat tray and let it reach room temperature until it is glossy and tacky.
Phase 2: Assembling the Roll 4. Wrap your bamboo mat in plastic wrap to prevent sticking. 5. Place a nori sheet on the mat. Wet your hands, then spread a thin, even layer of rice over the nori, leaving a 1 inch (2.5cm) border of bare nori at the top edge. 6.
Sprinkle sesame seeds over the rice, then flip the nori sheet over so the rice is face down on the plastic for an inside out roll. 7. Arrange a strip of cream cheese, smoked salmon, and sliced avocado across the center of the nori.
Phase 3: Rolling and Slicing 8. Lift the edge of the mat closest to you and roll it over the filling, tucking it in tightly. 9. Roll the rest of the way until the edge of the nori seals. 10. Wipe a very sharp knife with a damp cloth and slice the roll into 8 pieces.
Chef's Note: If you're struggling with the roll shape, use your fingers to gently square off the sides of the roll through the plastic wrap before slicing.
Fixing Common Rolling Issues

Rolling sushi is a bit like learning to ride a bike. Your first one might look a bit wonky, but it'll still taste great. The biggest hurdle is usually the rice.
Troubleshooting Common Issues
| Issue | Solution |
|---|---|
| Rice sticking to my hands | You aren't using enough water. Keep your "water bowl" full and dip your fingers every time you touch the rice. The vinegar helps, but water is the real barrier. |
| Why did my roll unravel when I sliced it | This happens when the roll is too loose or the rice was too dry to act as glue. Apply more pressure with the mat during the first turn. |
| Nori tearing | You likely added too much water or the rice was too wet. Only damp your hands, don't soak the nori. |
Adjusting Your Batch Size
If you're just cooking for yourself, you can easily scale this down. If you're feeding a crowd, it's better to work in batches rather than one massive pot of rice.
Scaling Down (½ Batch) Use 1 cup of rice and 1 ¼ cups of water. I suggest beating one egg and using half if you're making a variation that requires binder, but for this recipe, just halve everything. Use a smaller tray for cooling the rice so it doesn't dry out.
Scaling Up (2x-4x Batch) Don't quadruple the salt and sugar. Increase them by 1.5x only, then taste the vinegar mixture. Liquids can be reduced by about 10% when cooking in huge batches because less steam escapes. Work in batches of 4 rolls to keep the nori from getting soggy while you wait.
For those who want a different twist, you can try a Crab Stick Sushi method if you want something a bit crunchier.
Debunking Sushi Myths
There's a lot of noise about "perfect" sushi, but most of it doesn't matter for a home cook.
Myth: You need expensive "sushi grade" fish for every roll. Truth: For a Cream Cheese Sushi Roll, smoked salmon is a budget friendly and safe alternative that tastes better with cream cheese than raw fish does.
Myth: The rice must be seasoned for hours. Truth: Seasoning the rice while it's hot allows the grains to absorb the vinegar quickly. Room temperature is all you need before rolling.
Myth: You can't use a regular microwave for the rice. Truth: As long as you use a microwave safe bowl and the right water ratio, the result is nearly identical to a stovetop pot.
Storage and Zero Waste
Sushi is best eaten fresh, but you can save leftovers if you're careful.
Storage Guidelines Store your rolls in an airtight container in the fridge for up to 2 days. The rice will firm up, so let it sit at room temperature for 15 minutes before eating. Do not freeze these rolls. The cream cheese changes texture and the nori becomes rubbery.
Zero Waste Tips If you have leftover seasoned rice, don't throw it out. It makes the best base for a quick fried rice the next morning. Use the leftover avocado skins to make a quick mash for toast. Any leftover smoked salmon strips can be tossed into an omelet for a fancy breakfast.
Serving and Dipping Ideas
A Cream Cheese Sushi Roll is rich, so you need sharp flavors to balance the plate.
The Classic Pairing Serve with a side of pickled ginger and a small dollop of wasabi. The ginger cleanses your palate between bites, which is why it's standard.
The Dipping Upgrade Instead of plain soy sauce, mix in a teaspoon of sriracha or a drop of honey. If you're feeling fancy, try a Philadelphia Sushi Roll style presentation with a drizzle of eel sauce or spicy mayo on top.
Decision Shortcut If you want more heat, add a thin slice of jalapeño to the filling. If you want more crunch, add sliced cucumber or carrots. If you want it leaner, swap the cream cheese for mashed avocado.
Trust me, once you get the hang of the roll, you'll never go back to paying $15 for a basic roll. Just keep your hands wet, your knife sharp, and your rice tacky. Enjoy your homemade Cream Cheese Sushi Roll!
Recipe FAQs
Does cream cheese go in sushi rolls?
Yes, it is a popular addition. It adds a rich, creamy texture that balances the saltiness of the smoked salmon.
What goes with cream cheese in sushi?
Smoked salmon and avocado. These ingredients provide a classic balance of smoky and fresh flavors. If you enjoy this rich, savory profile, you'll love our tuna casserole.
Is it true that cream cheese is used in traditional Japanese sushi?
No, this is a common misconception. Cream cheese is a Western addition and is not found in traditional sushi.
How do I roll sushi maki as tight as possible?
Apply firm pressure with the bamboo mat during the first turn. Ensure your rice is tacky and not too dry so it acts as a natural glue.
Why doesn't my homemade sushi hold together?
The roll was likely too loose or the rice was too dry. Increase the pressure during rolling and ensure you folded in the vinegar, sugar, and salt while the rice was still hot.
What sushi is good for beginners?
Inside out rolls like this cream cheese version. They are approachable and use familiar ingredients like avocado and smoked salmon.
Why does the sushi rice stick to my hands?
You aren't using enough water. Keep a bowl of water handy and dip your fingers every time you touch the rice to create a barrier.
Cream Cheese Sushi Roll for 4 Rolls