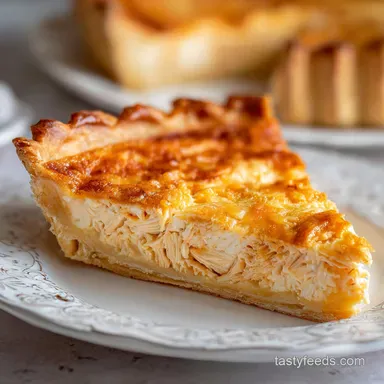
Chicken Pot Pie: Creamy and Flaky
- Time:20 mins active + 45 mins baking = Total 65 mins
- Flavor/Texture Hook: Buttery, flaky crust with a rich, creamy chicken filling
- Perfect for: Sunday family dinners or comforting meal prep
The smell of browning butter and sautéing onions is the only way to start a rainy afternoon. I remember the first time I tried making this, I poured a boiling hot filling directly onto a raw crust and watched in horror as it turned into a gummy, pale mess.
It wasn't a pie, it was more like a savory pudding with a wet blanket on top.
You don't want that. The secret to a proper Pot Pie isn't some fancy tool, it's just patience with your temperatures. If you let the filling cool slightly and keep your fats cold, you get that gold standard contrast between the crunch and the cream.
We are going for a result that feels like a hug in a bowl. Expect a filling that is thick enough to hold its shape but smooth enough to feel luxurious, topped with a crust that actually cracks when you hit it with a fork.
The Secret to a Great Pot Pie
Right then, let's get into why this actually works. Most people just throw everything in a pan and hope for the best, but there's a logic to the layers here.
Fat Pockets: Keeping the butter chilled in the dough creates tiny clumps that melt during baking, leaving behind air gaps that make the crust shatter.
The Roux Base: Cooking the flour with butter before adding liquid prevents that raw, pasty taste and ensures the sauce doesn't separate.
Steam Venting: Cutting slits in the top allows moisture to escape, which stops the crust from lifting or becoming soggy from the inside.
Filling Viscosity: Simmering the stock and cream creates a velvety texture that coats the chicken instead of pooling at the bottom.
| Method | Time | Texture | Best For |
|---|---|---|---|
| Fast Version | 35 mins | Softer, more uniform | Weeknight rush |
| Classic Version | 65 mins | Flaky, layered, rich | Weekend feasts |
Essential Component Breakdown
Before we start, we need to understand what each part is doing. I've had people ask me if they can swap the butter for oil, and the answer is a hard no if you want that specific flake.
| Ingredient | Science Role | Pro Secret |
|---|---|---|
| Chilled Butter | Creates steam gaps | Grate it frozen for faster mixing |
| All Purpose Flour | Provides structure | Measure by weight for consistency |
| Heavy Cream | Adds fat for silkiness | Room temp prevents curdling |
| Chicken Stock | Primary flavor carrier | Use low sodium to control salt |
Gear You Will Need
You don't need a professional kitchen, but a few things make this a lot easier. A heavy bottomed skillet is a must for the filling because it distributes heat evenly and stops the flour from clumping in the corners.
For the dough, a wide workspace is key. I usually clear my entire counter and sprinkle it with flour. A 9 inch deep dish pie plate is the standard here, but you can use a ceramic baking dish if that's what you've got.
Don't forget a pastry brush. I know you can use a spoon for the egg wash, but a brush gives you that even, golden glow without dripping egg all over the sides of the dish.
The Building Blocks
Here is exactly what goes into this Pot Pie. I've listed these specifically, so don't just grab any "white flour" or "butter" - the temperature and type matter.
For the Crust:
- 2 ½ cups all purpose flourWhy this? Standard protein level for a sturdy yet flaky crust
- 1 cup unsalted butter, chilled and cubedWhy this? Cold fat is the only way to get flakes
- 1 tsp saltWhy this? Enhances the buttery flavor
- 8 tbsp ice waterWhy this? Binds the dough without melting the butter
For the Filling:
- 3 cups cooked chicken breast, cubedWhy this? Pre cooked ensures the meat stays tender
- 4 tbsp unsalted butterWhy this? Base for the roux
- ⅓ cup all purpose flourWhy this? Thickens the sauce
- 2 cups chicken stockWhy this? Deep savory base
- ½ cup heavy creamWhy this? Creates the velvety mouthfeel
- 1 cup frozen peasWhy this? Adds pop of color and sweetness
- 1 cup frozen carrots, dicedWhy this? Earthy sweetness and texture
- 1 medium onion, finely dicedWhy this? Aromatic foundation
- 2 cloves garlic, mincedWhy this? Pungent depth
- 1 tsp dried thymeWhy this? Classic herbal pairing for chicken
- ½ tsp saltWhy this? Basic seasoning
- ¼ tsp black pepperWhy this? Subtle heat
For the Finish: - 1 large egg Why this? Protein for the golden brown color - 1 tbsp water Why this? Thins the egg for easier brushing
| Original Ingredient | Substitute | Why It Works |
|---|---|---|
| Heavy Cream | Whole Milk | Lighter feel. Note: Sauce will be less thick |
| All Purpose Flour | gluten-free Blend | Same structure. Note: Crust may be more crumbly |
| Chicken Stock | Vegetable Broth | Plant based base. Note: Lacks the deep meatiness |
| Dried Thyme | Fresh Rosemary | Similar herbal profile. Note: Use half the amount |
The Cooking Process

Now, let's get into the flow. I like to think of this in three phases: the sauce, the dough, and the assembly.
Phase 1: The Filling 1. Melt 4 tbsp butter in a skillet over medium heat. Add onion and carrots, cooking 5 mins until onions are translucent. Stir in garlic and thyme for 1 minute. 2.
Sprinkle in 1/3 cup flour and whisk constantly for 2 mins until the mixture forms a golden paste. This is your roux, and it's what stops the sauce from being watery. 3. Slowly pour in chicken stock and heavy cream, whisking vigorously to eliminate lumps.
Simmer 5 mins until the sauce is velvety and thick. 4. Stir in the cubed chicken and frozen peas. Remove from heat and let it cool slightly. Note: If you put boiling filling on raw dough, it will melt the fat and ruin the flake.
Phase 2: The Crust 5. Mix flour and salt, then cut in the chilled butter cubes until the mixture looks like coarse crumbs. Stir in ice water one tablespoon at a time until the dough just holds together. 6. Roll out the crust dough on a floured surface to a 12 inch circle.
Note: Don't overwork the dough or it will become tough.
Phase 3: Assembly & Bake 7. Drape the dough over the filling in a 9 inch deep dish pie plate. Trim excess, fold edges under, and crimp with a fork to seal. 8. Cut 3-4 small slits in the center of the crust to allow steam to escape. 9.
Beat egg and water together; brush the top of the crust for a golden finish, then bake at 350°F (180°C) for 45 mins until the top is golden and crackling.
Chef's Tip: To get an even more shatter crisp crust, pop your rolled out dough in the freezer for 5 mins before draping it over the pie. It locks the fats in place.
Fixing Common Bake Issues
Even for experienced cooks, things can go sideways. The most common issue is the "wet bottom," where the crust doesn't cook through because the filling is too heavy or too hot.
Soggy Bottom Causes
This usually happens because the filling was too liquid or was added while boiling. To fix this, ensure your roux is properly cooked and your filling has rested for at least 10 minutes before adding the crust. According to Serious Eats, managing moisture in pastry is the biggest hurdle to a crisp base.
Crust Shrinkage Issues
If your crust pulls away from the edges, it's likely because you stretched the dough instead of rolling it. Stretch creates tension, which snaps back in the oven. Roll gently from the center outward.
Pale Center Problems
A pale center usually means the oven temperature was too low or the pie was crowded. Make sure your oven is fully preheated to 350°F (180°C) and that you've cut enough steam vents.
| Problem | Root Cause | Solution |
|---|---|---|
| Gummy Crust | Filling too hot | Cool filling to room temp |
| Sauce Separating | Roux not cooked | Whisk flour/butter for 2 full mins |
| Burning Edges | Too much egg wash | Shield edges with foil after 20 mins |
Common Mistakes Checklist:
- ✓ Did you use ice cold butter?
- ✓ Did you let the filling cool before adding the crust?
- ✓ Did you cut steam vents in the top?
- ✓ Did you avoid overworking the dough?
- ✓ Did you brush the edges as well as the center?
Switching Up The Ingredients
If you're bored with the classic version, there are plenty of ways to tweak this. I've found that changing the crust is the fastest way to change the entire vibe of the dish.
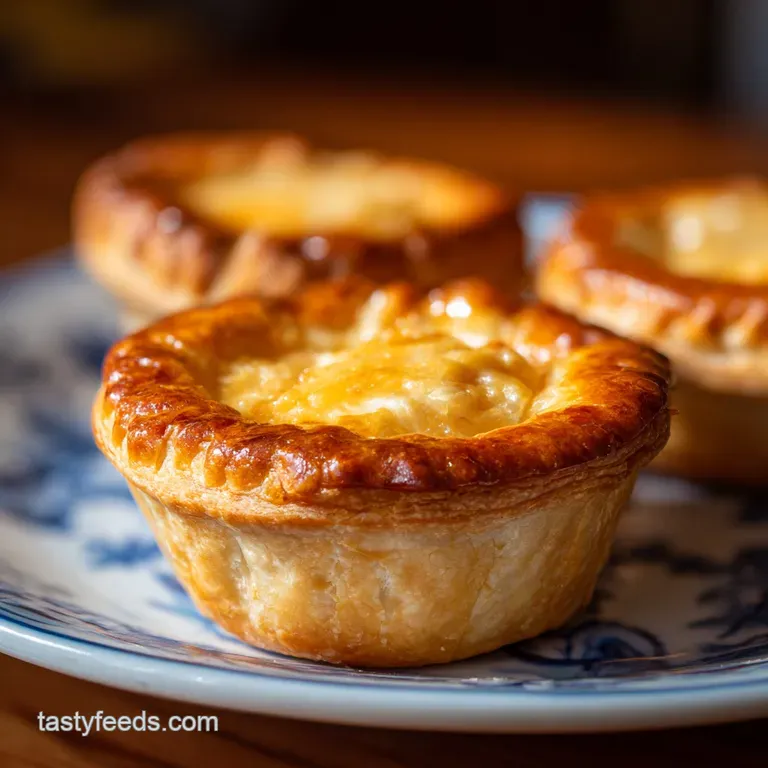
For a "Chicken Pot Pie with Puff Pastry," just skip the homemade dough and use a sheet of store-bought frozen puff pastry. It's faster and gives you a massive lift. If you want a "Chicken Pot Pie with Biscuits," drop spoonfuls of biscuit dough on top of the filling instead of a solid sheet.
You can also go the "Skillet Chicken Pot Pie" route. Just leave the filling in the cast iron skillet and top it with the crust. It's a bit more rustic and great for serving family style. If you want to make it vegetarian, swap the chicken for cauliflower florets and use vegetable broth. For a lighter version, you could try incorporating some of the techniques from my Instant Pot Potato Soup to create a thicker, lower fat base.
Adjusting the Size
If you're cooking for just two, you can easily scale this down. Use half the ingredients and a 6 inch or 8 inch pie dish. Reduce the baking time by about 20%, but keep an eye on the color.
When scaling up for a crowd, I recommend making two separate pies rather than one giant one. If you double the filling in one deep dish, the center often stays cold while the edges burn.
If you must double it in one pan, lower the temperature to 325°F (160°C) and extend the baking time by 15-20 minutes.
Debunking Kitchen Myths
There are a few things people tell you about this dish that just aren't true. Let's clear them up.
Myth: You must blind bake the crust. For a top crust only Pot Pie, blind baking is a waste of time. The filling is thick enough that it won't soak through if you've cooked your roux properly and cooled the filling.
Myth: Frozen peas ruin the sauce. Some people say frozen peas make the sauce watery. This only happens if you add them too early and boil them to death. Stir them in at the end; they only need a few minutes in the oven to heat through.
Saving And Reheating Leftovers
A Pot Pie actually tastes pretty great the next day, but the crust is the first thing to go. Store any leftovers in an airtight container in the fridge for up to 3 days.
For the freezer, I suggest freezing the pie before baking. Assemble it, wrap it tightly in plastic and foil, and it'll last for 2 months. When you're ready, bake it from frozen, but add about 15-20 minutes to the clock.
To reheat a slice without it becoming a soggy mess, avoid the microwave. Use an oven or an air fryer at 350°F (180°C) for 10 minutes. This brings the shatter back to the crust. If you're looking for other cozy ways to use your potatoes or veggies, check out my Air Fryer Potato Wedges as a side.
Zero Waste Tip: Don't throw away the onion peels and carrot ends from the filling prep. Toss them in a freezer bag; once you have a handful, simmer them with water to make a quick veggie stock for your next meal.
Best Side Dish Pairings
Because this dish is so rich and creamy, you need something to cut through that fat. I always lean toward things that are acidic or bright.
A crisp arugula salad with a lemon vinaigrette is the gold standard here. The bitterness of the greens and the zing of the lemon balance out the buttery crust perfectly. Steamed green beans or roasted asparagus also work well to add a fresh, snap like texture to the plate.
Avoid serving this with mashed potatoes or heavy pastas. You've already got carbs and cream in the Pot Pie, so adding more of the same just makes the meal feel too heavy. Keep the sides light, fresh, and a bit tangy to keep the palate refreshed between bites of that velvety filling.
Recipe FAQs
What is the secret to a flavorful pot pie?
Sauté the aromatics and cook the roux properly. Browning the onion, carrots, garlic, and thyme before adding stock removes the raw flour taste and builds a deep, savory base.
What are common pot pie mistakes?
Pouring hot filling onto raw dough and skipping steam vents. This leads to a gummy bottom and a lifting crust that doesn't brown evenly.
What ingredients go into a pot pie?
A combination of pastry dough, chicken, and a creamy vegetable sauce. It uses flour, butter, salt, and ice water for the crust, and chicken stock, heavy cream, peas, carrots, onion, garlic, and thyme for the filling.
How to prevent a soggy bottom crust?
Let the filling cool slightly before adding it to the dough. This stops the heat from melting the crust's fats prematurely, ensuring a crisp texture.
How to ensure the filling is thick and not runny?
Whisk the flour and butter into a golden paste before adding liquids. This creates a stable roux that thickens the chicken stock and heavy cream into a velvety sauce.
Is it true that I should pour boiling hot filling directly onto the crust?
No, this is a common misconception. Doing so creates a "wet blanket" effect that makes the crust gummy and pale instead of shatter crisp.
Can I adapt this filling for other meals?
Yes, the base works for various savory dishes. If you enjoyed the creamy texture here, see how we use a similar base for our creamy chicken soup.
Homemade Chicken Pot Pie