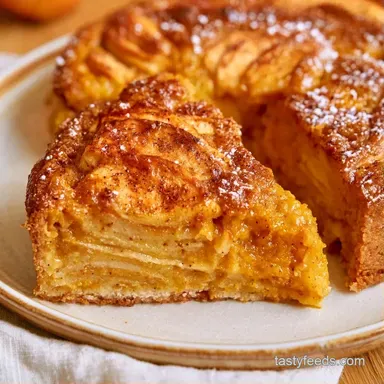
Pumpkin Apple Pie with Fresh Apples
- Time: 20 min active + 30 min chilling
- Key Appeal: A crisp, flaky buttery crust paired with a velvety center
- Ideal for: Festive parties or a relaxing weekend project
Too often, "hybrid" pies end up soggy and rubbery. Mixing apples directly into the pumpkin usually results in a custard that won't set because of the excess fruit juice. There's nothing worse than spending an hour in the kitchen only to have your slice collapse on the plate.
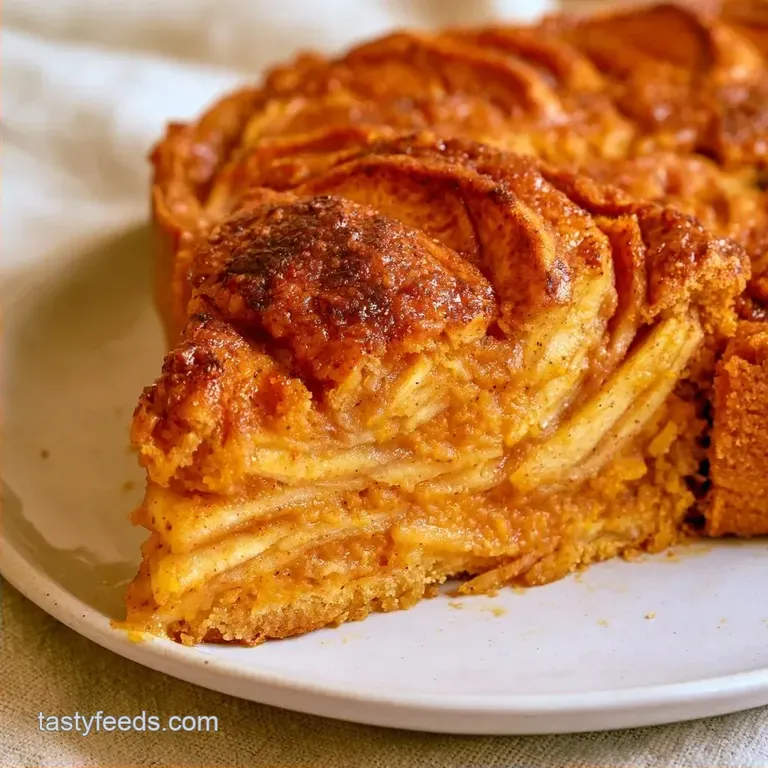
We're taking a different approach here. By placing the apple layer at the bottom, we build a solid base. This method ensures a sharp contrast between the tangy, firm apples and the spiced warmth of the pumpkin.
The result is a filling that stands tall and a crust that remains perfectly crisp. It fills your kitchen with a wonderful cinnamon aroma. Let's get started.
Pumpkin Apple Pie
This is a solid, reliable recipe. It doesn't rely on fancy tricks, just a bit of temperature control. The key is that initial blast of heat at 425°F to lock in the crust before the pumpkin custard begins to cook.
The contrast here is what makes it. You have the bright acidity of Granny Smith apples cutting right through the rich, maple sweetened pumpkin. It's not overly sweet, which means you can actually eat a second slice without feeling overwhelmed.
Trust me on the chilling time. If you skip the 30 minute fridge rest for the dough, the butter melts too fast, and you lose those flaky layers. It's a small wait for a huge difference in texture.
Why This Layout Actually Works
Layered Foundation: Placing apples at the bottom prevents them from watering down the custard, keeping the pumpkin layer stable.
Thermal Shock: Starting at a high temperature sets the pastry walls instantly, preventing the filling from soaking into the dough.
Maple Balance: Using maple syrup instead of refined sugar adds a woody depth that complements the earthy pumpkin notes.
What Goes Into the Pie
Before we get to the list, let's look at why these specific choices matter.
What Each Ingredient Does
| Ingredient | Role | If You Don't Have It |
|---|---|---|
| Chilled Butter | Creates flaky layers | Cold coconut oil (solid) |
| Granny Smith Apples | Provides tartness/structure | Braeburn or Honeycrisp |
| Evaporated Milk | Adds richness and stability | Heavy cream (slightly richer) |
| Pure Pumpkin Purée | Base flavor and bulk | Canned pumpkin (not pie filling) |
The Full List
For the Crust:
- 1.25 cups all purpose flour
- 0.5 tsp fine sea salt
- 1 tbsp granulated sugar
- 0.5 cup unsalted butter, chilled and cubedWhy this? High fat content for a shattering crust
- 4 tbsp ice cold water
For the Apple Layer:
- 3 cups Granny Smith apples, peeled and thinly slicedWhy this? Holds shape during long bakes
- 1 tbsp lemon juice
- 2 tbsp maple syrup
- 1 tsp ground cinnamon
- 0.25 tsp ground ginger
For the Pumpkin Filling:
- 15 oz pure pumpkin purée
- 3 large eggs
- 0.5 cup maple syrupWhy this? Better flavor profile than white sugar
- 1 cup evaporated milk
- 1 tsp ground cinnamon
- 0.5 tsp ground ginger
- 0.25 tsp ground cloves
- 0.5 tsp salt
Quick Substitutions
| Original Ingredient | Substitute | Why It Works |
|---|---|---|
| Maple Syrup | Honey | Similar viscosity. Note: Adds a floral note |
| Evaporated Milk | Whole Milk + 1 tbsp Butter | Mimics the fat content, though slightly less creamy |
| All purpose Flour | 1:1 gluten-free Flour | Works well in pastry. Note: Crust may be more fragile |
Right then, make sure your butter is truly cold. I usually pop mine in the freezer for 10 minutes before cubing it. It's a simple move that keeps the crust from becoming tough.
Gear You'll Actually Need
You don't need a professional setup, but a few tools make this a lot easier.
First, a food processor is the way to go for the crust. It cuts the butter in faster than a pastry blender, meaning the butter doesn't have time to warm up from your hands. If you don't have one, a bowl and two forks will work, but you'll have to be quicker.
You'll need a 9 inch deep dish pie plate. A standard pie dish might overflow because the apple layer adds extra height. I prefer glass or ceramic since they hold heat more evenly, which helps the bottom crust brown.
Finally, have a whisk and a large mixing bowl ready for the pumpkin mixture. A spatula is also handy for smoothing the top so you don't get any uneven peaks that might burn.
Making Your Pumpkin Apple Pie
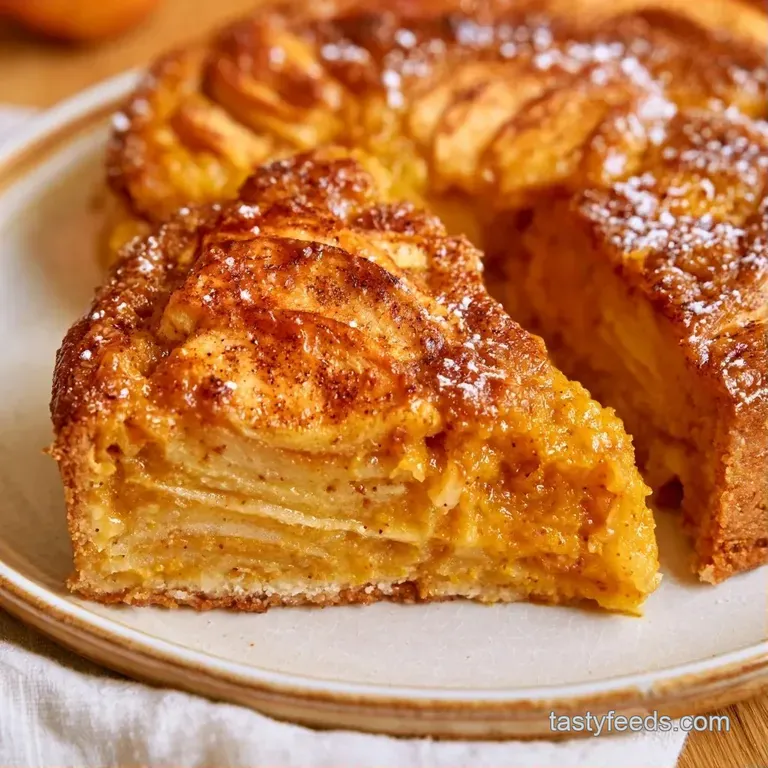
Let's dive in. Follow these instructions to achieve a beautiful result.
Prepare the crust
- Process the flour, salt, and sugar in a food processor.
- Pulse in chilled butter cubes until the mixture resembles coarse crumbs with some pea-sized pieces.
- Slowly add ice water one tablespoon at a time, pulsing until the dough just begins to clump together. Note: Avoid over processing to keep the crust from becoming tough
- Form the dough into a disk, wrap it in plastic, and chill for 30 minutes.
- Roll the dough into a 12 inch circle and press it firmly into the bottom and sides of your 9 inch pie plate.
Build the apple foundation
- In a medium bowl, toss together the sliced apples, lemon juice, 2 tbsp maple syrup, cinnamon, and ginger.
- Arrange the apple slices in a dense, even layer across the bottom of the chilled crust, pressing down lightly. Note: Tight layers stop the pumpkin filling from leaking through
Create the pumpkin custard
- In a large bowl, whisk the pumpkin purée and 0.5 cup maple syrup until completely smooth.
- Incorporate the eggs one by one, whisking well after each addition.
- Stir in the evaporated milk, salt, and pumpkin spices until the batter looks glossy.
- Gently pour the pumpkin mixture over the apple layer and level the top with a spatula.
Bake it
- Bake at 425°F (218°C) for 15 minutes to set the crust.
- Reduce the oven to 350°F (175°C) and bake for an additional 35-40 minutes until the edges are set and a mahogany brown. > Chef's Note: If you notice the crust edges browning too quickly during the second bake, loosely shield them with a ring of aluminum foil.
Fixing Common Baking Glitches
Even with a good plan, baking can be temperamental. Here is how to handle the usual suspects.
Fixing the Soggy Bottom
This usually happens when the apples release too much liquid or the oven isn't hot enough at the start. The fix is in the 425°F initial blast, which seals the pastry. If you still struggle, try brushing the bottom of the crust with a thin layer of beaten egg white before adding the apples.
Fixing Pumpkin Layer Cracks
Cracks often come from over whisking the eggs, which puts too much air into the custard. When the air expands in the oven and then collapses, you get a crack. Whisk the eggs in well, but stop once they are integrated. Also, let the pie cool slowly in the oven with the door cracked open.
Fixing Hard Apple Slices
If your apples are still crunchy, you likely used a variety that's too firm or didn't slice them thinly enough. Stick to Granny Smith for this Pumpkin Apple Pie. If you're using a very firm apple, you can sauté them for 3 minutes in a pan before layering them in the crust.
Swapping Flavors and Styles
After you have mastered the basic recipe, feel free to experiment with the flavors.
Adding a Pecan Topping
For extra texture, try adding a crumble. Combine 0.5 cup flour, 0.5 cup brown sugar, and 0.5 cup chopped pecans with 4 tbsp melted butter. Spread this over the pumpkin layer before baking to add a salty crunch that offsets the maple syrup.
Creating a Vegan Version
You can substitute the butter with chilled vegan butter and replace the eggs with "flax eggs" (1 tbsp ground flaxseed mixed with 3 tbsp water per egg). Use full fat coconut milk in place of evaporated milk. The consistency will be slightly denser, though the flavor remains delicious.
Alternative Fruit Bases
While apples are the standard, thinly sliced pears provide a softer, more floral flavor. If you are feeding a larger crowd, you might enjoy my apple slab pie.
Different Sweeteners
Using brown sugar instead of maple syrup will give the dish a more caramel like taste. However, the maple syrup is what provides that signature light, autumnal feel.
| Goal | What to change |
|---|---|
| More Tartness | Increase lemon juice to 2 tbsp |
| Deeper Spice | Add 0.25 tsp ground nutmeg |
| Extra Richness | Use heavy cream instead of evaporated milk |
Keeping Leftovers Fresh
To keep this pie at its best, follow these storage tips.
Place leftover pieces in a tightly closed container and refrigerate. They will remain delicious for up to 4 days. If stacking slices, place a sheet of parchment paper between them to keep them from sticking.
You can freeze either the entire pie or separate slices. To avoid freezer burn, wrap them securely in aluminum foil followed by plastic wrap. They stay good for approximately 3 months. To enjoy, move a slice to the refrigerator to thaw the evening before.
For reheating, the toaster oven is your best bet. Heating at 300°F for 5-10 minutes restores the crust's crunch. If a microwave is necessary, use medium power for 30 seconds to prevent the custard from becoming rubbery.
To minimize waste, save the apple peels. Simmer them in a pot with some water, sugar, and cinnamon to create a simple pancake syrup.
Serving Your Slices
Presentation is everything when you're sharing a homemade treat.
A dollop of unsweetened whipped cream is a must. The lightness of the cream cuts through the density of the pumpkin. For a bit of a kick, add a tiny pinch of cinnamon or nutmeg on top of the cream.
If you're serving this at a dinner party, try placing a thin slice of fresh apple on top of each piece for a professional look. It reminds everyone what's hiding inside that creamy layer.
For those who love creamy autumn desserts, a pumpkin cheesecake makes a great companion on a dessert platter. Serve the pie warm or at room temperature; both ways highlight the different flavors.
Why Most Recipes Get This Wrong
Most people treat the apple and pumpkin as a single mixture. When you stir apples into the custard, they act like little sponges, soaking up the moisture from the eggs and milk. This leads to a filling that never truly sets, leaving you with a "pudding" rather than a pie.
By separating the two, the apples can roast in their own juices at the bottom while the pumpkin sets into a stable, velvety custard on top. It's a simple change in architecture, but it changes the entire eating experience.
The over high heat start is the other missing piece in many guides. Most people start at 350°F, but by the time the pumpkin is cooked, the bottom crust has been steaming for an hour.
Starting at 425°F gives the butter in the crust a chance to evaporate and crisp up before the moisture from the apples can seep in.
This Pumpkin Apple Pie is all about those little details. When you get the temperature and the layering right, you get a dessert that feels balanced and thoughtful.
Approximate, per serving. Data source: USDA FoodData Central.
Whether you're baking this for a holiday or just because it's a rainy Tuesday, it's a wonderful way to bring some warmth into the kitchen. This Pumpkin Apple Pie is a love language in dessert form.
Just remember to keep your butter cold, don't over whisk your eggs, and give yourself that 30 minutes of chilling time. Happy baking!
Recipe FAQs
Do pumpkin and apple flavors complement each other?
They pair perfectly because the tartness of the apple cuts through the dense richness of the pumpkin.
Tip: Use Granny Smith apples for the best acid balance.
Which mistakes often ruin pumpkin pie texture?
Overmixing the eggs or baking at too high a temperature for too long causes the custard to crack.
Tip: Pull the pie from the oven when the edges are set but the center still has a slight jiggle.
Is it true that apples must be pre-cooked before adding them to the pie?
Surprisingly, no. The 55-minute bake time is sufficient to soften thin slices of fresh apple.
Tip: Slice the fruit thinly to ensure they tenderize fully during baking.
Should I choose heavy cream over evaporated milk for the filling?
Evaporated milk provides a lighter, more traditional texture than heavy cream.
Tip: If you love the creamy consistency here, you'll appreciate how we balance moisture in our pumpkin spice cake.
How to assemble the pumpkin apple pie layers?
Arrange sliced apples in a tight layer across the bottom of the chilled crust, then pour the pumpkin mixture over the top.
Tip: Press the apple slices down slightly to prevent them from floating.
Must the crust be blind baked before adding filling?
Not true. This recipe uses a two-temperature baking method to set the crust and filling simultaneously.
Tip: Start at 425°F for 15 minutes to lock in the crust structure before lowering the heat.
Pumpkin Apple Pie for 8 Slices