Honey Butter Chicken: Shatter Crisp Glazed

- Time: Active 10 mins, Passive 15 mins, Total 25 mins
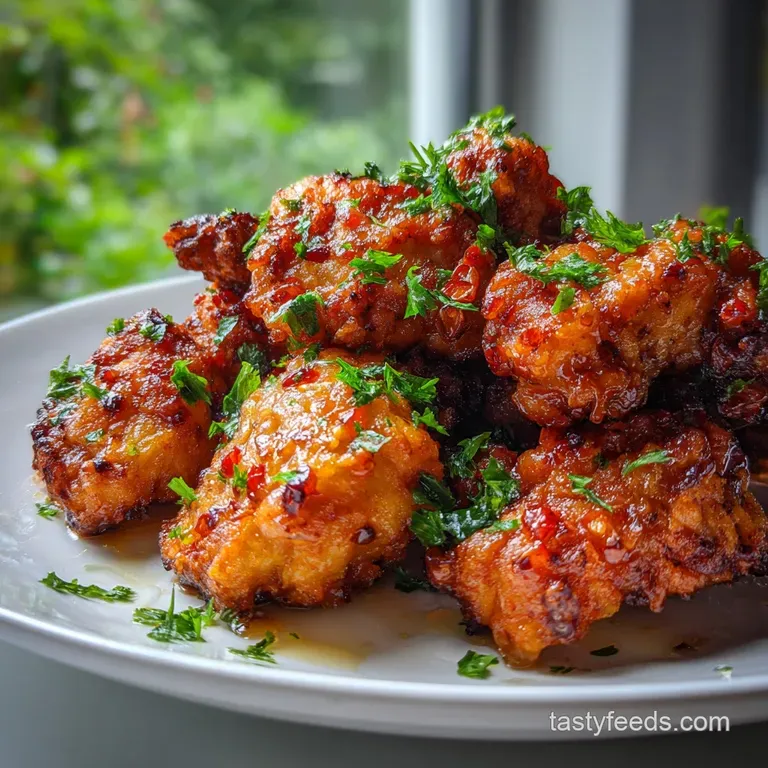
- Flavor/Texture Hook: Shatter crisp exterior with a velvety honey soy glaze
- Perfect for: High speed weeknight survival or a crowd-pleasing quick meal
- Quick and Crispy Honey Butter Chicken Recipe
- Why This Glaze Truly Shines
- Essential Components and Science
- The Minimalist Kitchen Setup
- Selecting Your Raw Elements
- Step-by-Step Cooking Process
- Troubleshooting Common Cooking Issues
- Smart Substitutions and Scaling
- Myth: Searing Seals Juices
- Storage and Zero Waste Tips
- Perfect Sides for This Dish
- Recipe FAQs
- 📝 Recipe Card
Quick and Crispy Honey Butter Chicken Recipe
Ever wonder why some chicken dishes arrive at the table looking like a sticky, soggy mess while others maintain a glassy, audible crunch? It’s not magic, and it’s certainly not a complicated restaurant secret.
I discovered this specific method during a Tuesday night meltdown when I had exactly twenty minutes to feed three hungry people and only a few staples in the pantry. The sizzle of the chicken hitting the hot oil was the only sound in the kitchen until the first bite, which was met with a literal silence of appreciation.
We are skipping the laborious double frying methods today. This version is all about efficiency and bold impact. You get that iconic Korean style sweetness combined with a rich, buttery finish that coats the palate without feeling greasy.
If you’ve been let down by watery sauces or bland breading before, this is your survival guide to getting it right every single time.
You should expect a dish that balances the saltiness of soy with the floral notes of honey, all anchored by a hit of garlic. The texture isn't just "fried"; it's a specific type of brittle crunch that stands up to being tossed in a warm sauce.
It’s the kind of meal that makes you feel like a pro even when you're just trying to get through the evening.
Why This Glaze Truly Shines
The Cornstarch Barrier: Using cornstarch instead of flour creates a gluten-free shield that absorbs less oil and results in a thinner, more brittle "shatter" when bitten.
Emulsification Stability: Cold butter added at the end of the sauce reduction creates a stable emulsion, resulting in a thick, velvety coating rather than a separated oily mess.
Hygroscopic Balance: The honey acts as a humectant that clings to the chicken while the vinegar cuts through the sugar to prevent the flavor from becoming cloying.
Maillard Acceleration: The small amount of soy sauce provides amino acids that speed up the browning process, giving the chicken a deep color in a short cook time.
| Cook Method | Prep Time | Resulting Texture | Best For |
|---|---|---|---|
| Stovetop (Sear) | 15 mins | Extra crispy edges | Maximum flavor impact |
| Air Fryer | 12 mins | Firm and dry crisp | Lower calorie survival |
| Deep Fry | 8 mins | Uniform golden shell | Traditional indulgence |
This method is significantly faster than the classic restaurant versions, which often involve multiple dredging stations. If you’re a fan of these quick hit meals, you might also find success with a Marry Me Chicken recipe when you want something creamy rather than sweet.
Essential Components and Science
Ingredient Deep Dive
| Ingredient | Science Role | Pro Secret |
|---|---|---|
| Chicken Thighs | High fat retention | Use thighs over breasts for juice loaded bites that don't dry out. |
| Cornstarch | Amylopectin structure | Pat the chicken dry first so the starch forms a tight, thin skin. |
| Cold Butter | Fat in-water emulsion | Keep the cubes in the fridge until the very last second for a glossy sauce. |
| Apple Cider Vinegar | pH Balancing | This brightness wakes up the honey so the sauce doesn't taste flat. |
The Minimalist Kitchen Setup
We don't need a kitchen full of gadgets for this. A wide, heavy bottomed skillet is your best friend here I usually reach for my cast iron or a heavy stainless steel pan. The goal is heat retention; if the pan temperature drops when the chicken hits, you’ll end up steaming the meat instead of searing it.
A large mixing bowl is essential for the dredge. You want enough room to toss the chicken vigorously so every nook and cranny is coated in starch. Finally, a pair of metal tongs will give you the precision you need to flip the pieces without knocking off that delicate crust we’re building.
Selecting Your Raw Elements
- 1.5 lbs chicken thighs: Cut into 1 inch pieces. Why this? Thighs stay tender even at high searing temperatures.
- Substitute: Chicken breasts (will be slightly drier).
- 0.5 cup cornstarch: For the coating. Why this? Creates a crispier, lighter shell than all purpose flour.
- Substitute: Potato starch for an even glassier crunch.
- 1 tsp garlic powder: Mixed into the dredge. Why this? Seasons the meat directly under the crust.
- Substitute: Onion powder for a sweeter, milder profile.
- 0.5 tsp salt and black pepper: Basic seasoning.
- 2 tbsp neutral oil: For frying (avocado or vegetable oil).
- 0.33 cup honey: The base of the sweetness. Why this? Provides the "cling" and gloss to the sauce.
- Substitute: Maple syrup (adds a woodsy flavor profile).
- 4 tbsp unsalted butter: Cold and cubed. Why this? Cold fat creates a thicker, creamier emulsion in the pan.
- 3 cloves garlic: Minced fresh. Why this? Fresh garlic provides the aromatic punch powder lacks.
- 1 tbsp soy sauce: For salt and depth.
- 1 tbsp apple cider vinegar: To balance the sugar.
- 1 tsp toasted sesame seeds: For garnish and nuttiness.
- 2 stalks green onions: Thinly sliced for freshness.
step-by-step Cooking Process
- Dry the protein. Pat the 1.5 lbs chicken thighs thoroughly with paper towels. Note: Moisture is the enemy of a crisp crust.
- Season the chicken. Toss the pieces with 0.5 tsp salt, 0.5 tsp pepper, and 1 tsp garlic powder.
- Apply the dredge. Coat the chicken in 0.5 cup cornstarch until every piece is fully white and chalky.
- Heat the pan. Add 2 tbsp neutral oil to your skillet over medium high heat.
- Sear the chicken. Place chicken in the pan in a single layer. Note: Do not overcrowd or it will steam.
- Develop the crust. Cook for 8-10 mins, flipping occasionally, until the exterior is golden and feels firm.
- Build the sauce. Push chicken to the sides; add 0.33 cup honey, 3 cloves minced garlic, 1 tbsp soy sauce, and 1 tbsp vinegar.
- Simmer the liquid. Let the mixture bubble for 1-2 mins until the sauce looks syrupy and thick.
- Mount the butter. Stir in the 4 tbsp cold cubed butter 1 piece at a time. Note: This creates the "velvety" finish.
- Final toss. Coat the chicken in the sauce and garnish with 1 tsp sesame seeds and sliced green onions.
Troubleshooting Common Cooking Issues
Why Your Sauce Separated
If the sauce looks like a pool of yellow oil with dark bits at the bottom, your heat was likely too high when you added the butter. Butter is an emulsion of fat and water; if you boil it too violently, that bond breaks.
| Problem | Root Cause | Solution |
|---|---|---|
| Soggy Coating | Too much moisture | Pat chicken bone dry before dredging in starch. |
| Burnt Garlic | Added too early | Add fresh garlic with the liquids, not the frying oil. |
| Thin Sauce | Not enough reduction | Simmer the honey and soy for 30 seconds longer before adding butter. |
If you ever find yourself struggling with a different flavor profile, like the acidity in an Olive Garden Chicken recipe, remember that balancing fat and acid is the universal key to success.
Common Mistakes Checklist ✓ Pat the chicken completely dry (this is the most skipped step!). ✓ Ensure the oil is shimmering before adding the chicken. ✓ Work in two batches if your pan isn't large enough to keep space between pieces.
✓ Use cold butter, not room temperature, to finish the glaze. ✓ Don't walk away while the honey is simmering; it can burn in seconds.
Smart Substitutions and Scaling
Adjusting for Different Sizes
If you are cooking for a larger crowd, avoid simply doubling everything in the same pan. Downscaling (½ recipe): Use a smaller skillet (8 inch). You can use a whole egg yolk in the dredge if you want a richer crust, but it isn't strictly necessary for this starch only version.
Upscaling (2x-4x): Work in distinct batches for the chicken. Use a second pan for the sauce if needed. Only increase the honey and soy by 1.5x initially, then taste sugar and salt can become overwhelming when scaled linearly.
| Serving Size | Chicken Amount | Pan Suggestion | Cook Time Change |
|---|---|---|---|
| 2 People | 0.75 lbs | 8 inch skillet | Same (batches faster) |
| 4 People | 1.5 lbs | 12 inch skillet | Standard 15 mins |
| 8 People | 3 lbs | 2 skillets | +10 mins (batching) |
Decision Shortcut
- If you want a spicier kick, add 1 tsp of red pepper flakes to the honey.
- If you want a thicker crust, dip the chicken in whisked egg before the cornstarch.
- If you want maximum health, use the air fryer method at 400°F for 12 minutes.
Myth: Searing Seals Juices
One common misconception is that searing meat "seals in the juices." In reality, the high heat actually causes the muscle fibers to contract and push moisture out. The real reason we sear is the Maillard reaction the chemical reaction between amino acids and reducing sugars that gives browned food its distinctive flavor.
The "crunch" we enjoy is actually the result of dehydration of the surface, not a moisture tight seal.
Another myth is that you must use expensive honey. For a cooked sauce like this, the delicate floral notes of raw, expensive honey are often lost. A standard clover honey works perfectly because we are relying on the caramelization and the butter to provide the primary flavor profile.
Storage and Zero Waste Tips
Storage Guidelines Keep leftovers in an airtight container in the fridge for up to 3 days. To reheat, avoid the microwave if you want to keep any semblance of crunch.
Instead, toss the chicken back into a dry skillet over medium heat for 4-5 minutes, or use an air fryer at 350°F for 3 minutes. This dish does not freeze well once the sauce is applied, as the starch coating will become spongy.
Zero Waste Ideas Don't toss those green onion roots! Place them in a small jar of water on your windowsill, and they’ll regrow in a week. If you have leftover sauce in the pan, toss in some steamed broccoli or snap peas to soak up the honey butter goodness.
It’s a great way to clear out the crisper drawer while keeping the flavor profile consistent.
Perfect Sides for This Dish
Since this chicken is quite rich and sweet, you need something to cut through that intensity. A simple bowl of steamed jasmine rice is the classic choice, as it acts as a neutral sponge for the extra glaze.
For a vegetable side, try a quick cucumber salad with rice vinegar and sesame oil to provide a cold, acidic contrast to the warm, buttery chicken.
If you’re feeling adventurous, this chicken also pairs surprisingly well with something crunchy and sweet for dessert, like a Butter Toffee Pretzels recipe. The salt and sugar theme carries through the whole meal perfectly. Whether you serve it over rice, noodles, or even tucked into a wrap, the key is keeping the sides simple so the honey butter glaze remains the star of the show.

Recipe FAQs
What is honey butter chicken?
It is a dish featuring fried chicken coated in a thick, glossy glaze. This glaze combines the sweetness of honey with the richness of melted butter, often balanced with savory notes from soy sauce and garlic for a highly addictive sweet and salty profile.
Does traditional butter chicken have honey in it?
No, traditional butter chicken does not contain honey. Classic Indian Butter Chicken (Murgh Makhani) relies on tomatoes, cream, and spices like garam masala for its flavor; honey is specific to the East Asian inspired honey butter glaze.
Are honey and butter good together in savory dishes?
Yes, honey and butter create an excellent savory sweet base. The fat in the butter carries the flavor of the honey, and when combined with salty elements like soy sauce, it achieves a complex flavor bomb that coats proteins well.
What is honey butter sauce good on besides chicken?
It is fantastic on seafood, roasted root vegetables, or waffles. The rich glaze works well anywhere you need a high impact sweet savory finish; for example, it’s surprisingly good drizzled over a batch of Waffle Recipe for one.
How to ensure the chicken stays crispy after tossing in the sauce?
Toss the chicken quickly just before serving and use cold butter cubes for the emulsion. The cold butter creates a thicker, more stable emulsion that clings to the cornstarch crust rather than soaking into it, which is a key principle in achieving a stable glaze consistency.
Can I use chicken breasts instead of thighs for this recipe?
Yes, but thighs are highly recommended for better moisture retention. Breasts cook faster and can dry out easily under the high heat needed for searing; if you do use breasts, cook them in smaller batches to maintain pan temperature, similar to how you handle smaller cuts in our Braised Mock Tenderloin recipe.
Is it true that I must use cornstarch and not flour for the coating?
No, this is a common misconception if you prioritize maximum crunch. Cornstarch forms a thinner, more brittle shell than all-purpose flour because it lacks gluten, resulting in a shatter crisp texture that holds up better to the wet glaze.
Honey Butter Chicken Recipe

Ingredients:
Instructions:
Nutrition Facts:
| Calories | 522 calories |
|---|---|
| Protein | 29.8g |
| Fat | 26.4g |
| Carbs | 39.5g |
| Fiber | 0.8g |
| Sugar | 23.4g |
| Sodium | 610mg |
